

Setting up a volleyball coaching machine might seem somewhat of a challenge, but with the right approach, it is just as easy. Whether you are a coach trying to improve his team’s practice session or a mere beginner aiming to brush on your skills, all that you need to know will be discussed here. We are here to lead you along the way and help you with all aspects of the setup and operational process from simply unpacking the machine to refining the settings for particular drills. This guide will not only show you how to set your machine but also how to best utilize it to improve your practice sessions, accuracy, and reaction time. Get the match ready because, after all, your volleyball proficiency is well poised for boost!
Key Takeaway
This guide will not only show you how to set your machine but also how to best utilize it to improve your practice sessions, accuracy, and reaction time. Get the match ready because, after all, your volleyball proficiency is well poised for a boost!
Introduction to Volleyball Training Machines

Importance of a Volleyball Training Machine
Volleyball training machines are indispensable for players and coaches aiming to maximize performance. The need for a whole gang of players or human feeders to reload balls during training is eliminated. Thus, the player can concentrate on each repetition of technique, accuracy, and timing, leading to quicker skill strength.
The volleyball machine is able to replicate real-game scenarios well. Players may practice reception, spiking, and digging with a range of speeds, angles, and frequencies. This kind of exposure would indeed build confidence in the player and prepare him or her for various circumstances that can arise during a game, thus greatly increasing adaptability as well as reaction time.
In fact, these machines save time in the workout by providing constant workout shots without interruption. This further allows the coach to focus more on analyzing and correcting the form and/or strategy of any particular player while the machine never deviates from carrying out the programmed execution. A volleyball training machine, therefore, improves training sessions as they become more time savers, despite being more focused and productive.
Overview of Volleyball Training Machine
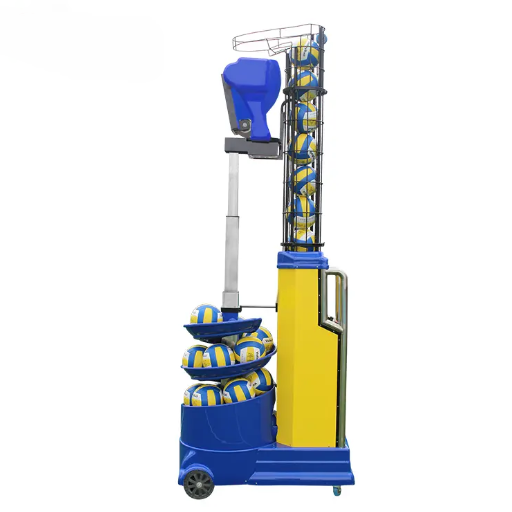
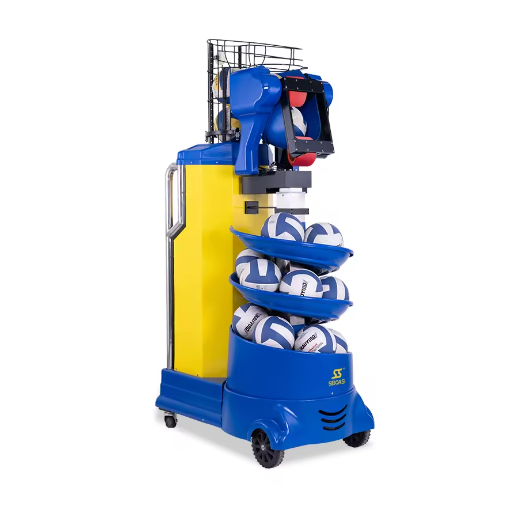
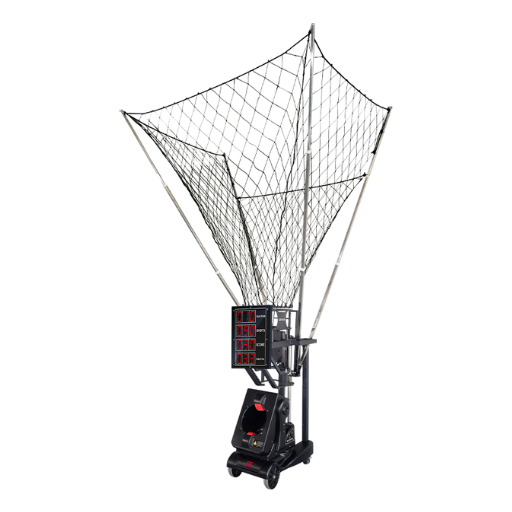
Volleyball training machines are hardware gadgets that are designed expressly to ensure the highest efficiency with respect to volleyball practicing. They are capable of continuously executing serves, spikes, and volleys with a given precision, thereby allowing the player to practice his/her play-making skills, reflexes, and groundwork positioning under controlled settings. When they ensure that ball delivery can be anticipated in its precision and repeatability, these machines do allow players to practice the honing of particular skills in an environment not as spontaneous as that of live drills.
A great boon is that users of the training machine are able to configure these systems to perform drills specific to individual or team developmental goals. With regard to this, the program may comprise different settings of speed, spin, and trajectory to help imitate different sorts of game conditions and moments that players ought to practice in preparing for matches. Additionally, this manner of training allows a player to correctly develop particular skills others may require—such as withstanding spirit-busting missile-won hits or mastering the reception of serves at the back court.
Then volleyball training machines to an extent provide a unique angle to save time and multiply the effective use of practice. Given that no one is required to manually serve, coaches and players are better able to get into detailed analysis and improve the strategy. The machines intensify the practice and at the same time inhibit fatigue and ensure that the players practice at their best. To sum up, volleyball training machines bring about structures, efficiency, and diversity to volleyball training, which is greatly appreciated by players throughout all levels of the game.
Types of Volleyball Training Machines
Volleyball training devices fall under different categories and target different aspects of the game. One category is serving machines that throw serves with different speeds, spins, and angles so that players can practice effective return techniques. These machines reflect game-like situations very well and are crucial for enhancing players’ abilities in the service receiving and defense.
The other category is the setting machine whose purpose is to be “as accurate a setter as possible” of all time. In the event that the machine executes the set successfully, the attacker has the chance to overpower the ball with an excellent approach. Setting machines are important for trying to develop timing between setters and attackers through repeated replication of game dynamics.
Furthermore, there are machines that are designed to assist blocking and defensive drills. They can simulate an opposing attack and force a blocker or defender to adjust his/her positioning and timing correctly. Inducing these consistent and repeatable scenarios reinforces the response time of the player and skill improvements towards effective techniques. If used together, these machines provide a complete training approach for volleyball at any level of the game.
Unboxing and Initial Assembly

What’s in the Box?
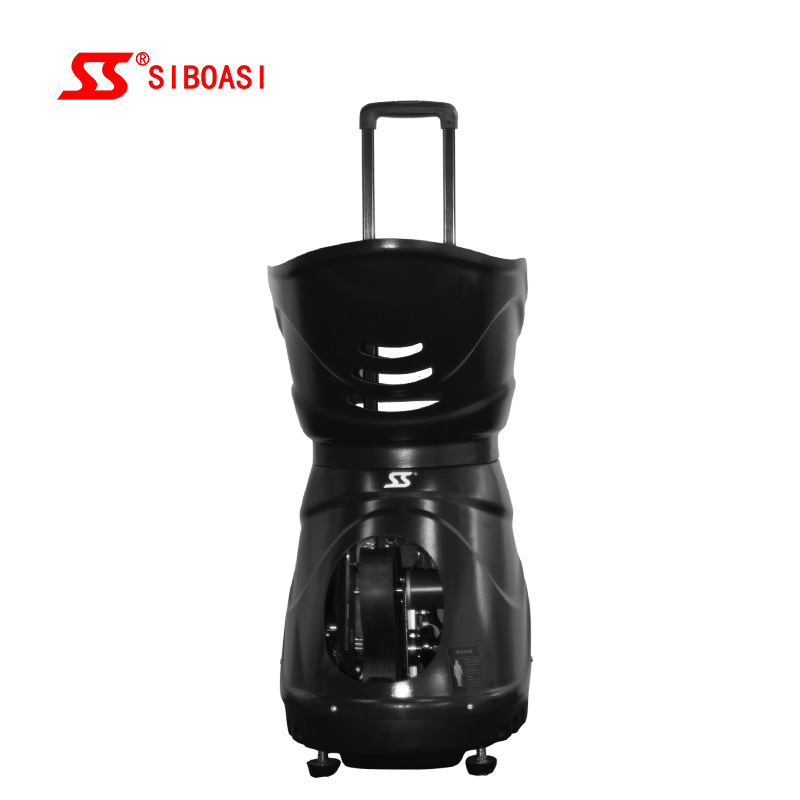
Inside your box, you can expect all the necessities essential to assemble and start using a volleyball machine. Usually included is the main body of the machine, as well as the wheels or the mobility base, power cord, user guide, and all other tools for the assembly, like screws, bolts, wrench, etc. The parts are also sealed secure to prevent in-transit damage.
Usually, the main part of the machine will include the motor along with various other mechanical parts responsible for the ball’s trajectory, speed, and spin. There may also be adjustable levers or extensions designed to simulate different kinds of serves and spikes. All these components are simple to identify and usually partially pre-assembled; this minimizes the implementation process.
In addition, the package normally gets a manual that gives a detailed guide on assembly and operation. It is very important that you read through this manual so that you don’t lose out on any parts provided. If any parts are missing or damaged, contact the supplier immediately to get a fresh supply.
Required Tools for Assembly
After the task of assembling the volleyball training machine proper, it is important to have the following basic tools that may be found in almost every home tool kit:
- ✓ Screwdriver (Phillips or flat)
- ✓ Wrench or spanner for locking bolts
- ✓ Rubber mallet (for tight components)
- ✓ Tape measure (for alignment)
💡
Pro Tip
Make sure to refer to your specific assembly instructions and look for any explicit tool requirement provided within the kit. Use recommended tools to ensure a quick and safe assembly.
Step-by-Step Assembly Instructions
- 1
Unpacking Components
Unpack your packaging, leaving open all parts listed in the manual. Select a flat, clean surface to prevent loss of smaller parts. - 2
Prepare the Base
Commence by setting up a strong base. Use the supplied diagrams to fit stabilizer legs securely. A steady base is crucial for safety. - 3
Fixing the Main Frame
Affix the main frame onto the base as instructed; ensure all parts are aligned properly. Recheck each joint to prevent loose frames. - 4
Attaching the Machinery
Mount the ball holder or throwing machine onto the upper frame. Ensure it is mounted securely at its axis and is level. - 5
Inspect Electrical Connections
Verify structural components are connected to the electronic system. Test the electronics by energizing them to ensure proper power. - 6
One Last Inspection
Examine all nuts and bolts. Run a quick test-run without balls to confirm all parts move properly before full use.
Calibrating Your Volleyball Training Machine

Understanding Machine Settings
Adjusting the Power Settings: The power settings govern the force and velocity of the launch. Start with low power and adjust upwards to suit player ability and drill needs. This assists in creating a realistic atmosphere while minimizing injury risk. Always strictly adhere to manufacturer directions.
Configuring Ball Spin and Trajectory: Numerous machines allow users to adjust spin (topspin/backspin) and trajectory. Spin is good for practicing serves and hits, while trajectory adjustments fine-tune launch angles and height for specific drills like hard serves or looping sets.
Ensuring Consistency and Safety: Hold a tryout to verify performance remains constant. Run a few planned trials and manage a clean working environment to maintain stability. Monitoring guidelines is essential for safe, maximum utilization.
Calibrating Ball Speed and Trajectory
Calibration is fundamental for maximizing performance. First, consider specific training goals. Lower speeds and angles are better for beginners working on ball control. Advanced players can increase speed and use sharper angles to practice reaction time for defending strong hits.
Most machines feature labeled controls for speed and frequency. Watch the release and landing positions across the targeted area. Testing settings helps identify what performs best for different skill levels. Setting a standard allows coaches and players to refer back to these successful sessions.
To get a perfect trajectory, tweak the launch arc to illustrate real-match scenarios like serving or spiking. Set the machine straight to ensure precise results. Periodic checks by technicians and recalibration will ensure sustained reliability and expand total productivity.
Testing and Adjustments
To ensure an indoor spiking machine performs well, first check that all parts function and are in place. Follow this with evaluations to set up tests based on the first shot. The trajectory into the net will indicate where adjustments are needed for launch distribution.
When adjustments are needed, focus on ball speed, direction, and frequency. Fine-tune these via integrated controls tailored to training needs. For serving or spiking practice, mimic realistic game situations. Recalibration is necessary for the machinery to stay in top form.
Further, frequent monitoring and maintenance should be observed. Regular cleaning ensures no dust interferes with functioning. Follow manufacturer regulations on maintenance schedules and replacement of worn parts. Call technicians for serious calibration work to keep the machine at peak efficiency.
Advanced Drill Setup
How to Create Excellent Training Drills
Effective drills improve skill levels, teamwork, and overall performance. Drills should include serving, receiving, setting, blocking, and spiking. An ideal practice consists of a combination of facility drills and game skills that replicate match scenarios.
First, adjust machine settings according to the drill goal. For instance, varying direction, speed, and spin measures a receiver’s accuracy. This helps players learn positioning and techniques for demanding game situations. Spiking drills can apply similar standards to develop timing, power, and placement.
Finally, teamwork and decision-making are vital. Set up scenarios where quick reaction time and coordination are required. Repeatedly measure competence and modify drills to introduce new challenges for continuous improvement.
Combining Different Drills for Comprehensive Training
Using training machines ensures exercises are carried out quickly and effectively. By including the machine in various drills, players practice timing and reaction speed in controlled conditions. One way is to combine robotic drills with free-play drills.
For instance, a coach could have the machine serve with pinpoint accuracy while players work on receive-and-transition drills. This builds fundamentals while initiating team communication. Variable training drills can also simulate opponent attacks to increase defensive strategy.
Adding robot drills for proficiency allows players to practice specific deficits, individualizing their progress in serves, digs, or spikes. These group trainings allow the machine to lay a strong foundation for overall team adaptability and success.
Maintenance of Your Volleyball Training Machine
Routine Maintenance Tips
| Task | Action Required |
|---|---|
| Cleaning | Use a soft cloth for external parts; follow manual for internal mechanisms. |
| Component Check | Inspect wheels, motor, and launching system for wear or damage. |
| Storage | Store in a cool, dry place with a protective dust cover. |
| Lubrication | Follow manufacturer guidelines to reduce friction in moving parts. |
Common Issues and Troubleshooting
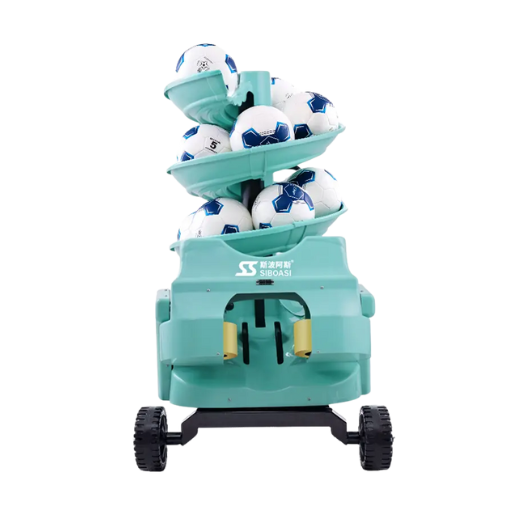
Ball Jamming in the Machine: A common problem caused by improperly sized or old balls. Ensure balls are properly inflated and meet recommended conditions. Replace worn balls to alleviate jamming.
Uneven Ball Launch: If angles or speeds are inconsistent, the feeding or throwing mechanism may be wearing out. Dirt accumulation in the chambers or chute can also be a factor. Clean the chamber and consult the manufacturer regarding worn parts.
Won’t Power On: Generally a power source or wiring issue. Check that the cable is plugged in and undamaged. If it still doesn’t power on, consult the service manual and a professional technician. Take safety precautions during diagnosis.
Long-Term Care for Durability
High performance depends on regular maintenance. Start by removing dirt and debris collected during use. Clean moving parts to ensure continued movement and prolong machine life. Check for signs of wear on springs, wires, and adjustable parts. Tighten loose screws promptly and use compatible replacement parts. Always keep the servicing manual for reference.
Prevent moisture or temperature extremes by storing the machine in a clean, dry environment. This protects mechanisms against corrosion. Proper care increases lifespan and ensures the machine performs tasks without glitches for a much longer time.
Frequently Asked Questions (FAQ)
Q: What are the very first steps that you could possibly implement to install a volleyball training machine?
A: Begin by unpacking to ensure all components are present: frame, poles, upright supports, base, and net system. Find a flat area, establish height adjustment, and read the provided directions. Attach the aluminum or steel frame, hang the net if supplied, and check equipment for accuracy.
Q: How to set up the volleyball net and make sure the net height is perfect for training?
A: Attach the net to the poles and vertical uprights. Use adjustable poles to set the height for specific player levels. Ensure the net is straight and taut using tension straps for effective passing, serving, and setting drills.
Q: Is the volleyball training machine portable so that it can be moved between the indoor gym and playground?
A: Yes, many modern machines feature light aluminum frames or wheels. This makes them ideal for schools or clubs requiring quick setup and teardown. Check the machine weight and compact storage options to ensure it fits your transport needs.
Q: What volleyball training equipment and exercises are best for use in tandem with a training machine?
A: Use ball feeders, target attachments, and passing drills. Repetition in setting, serving, and jumping will increase player reaction. Programmed drills can simulate game scenarios for optimal repetitions and measurable improvement.
Q: What is the maintenance and best practice to keep the volleyball trainer and net system in optimal condition?
A: Inspect the frame for rust, tighten bolts, and check the net for wear. Lubricate mechanical joints and ensure the base remains stable. Store in a dry area to prevent corrosion and extend the life of the device.
Q: Are there some tips on safety and adjustments for different levels of age and experience for players?
A: Adjust height, angle, and speed according to skill level. Parents must supervise younger athletes. Ensure a stable base and use padding on poles to prevent tipping. Start with lower speeds to build player confidence.
Q: What are the best ways to find volleyball training gear and supplementary items to go alongside the machine?
A: Select gear based on training goals, such as vertical jump trackers or target attachments. Look for trustworthy manufacturers and compare portability and adjustability. A mix of specific sporting equipment pieces will upgrade practice regimens.
References
-
Volleyball Crossbow – Group W – Scholarly Repository
This document discusses the user-friendly design and adjustable features of volleyball setter machines, including launch angle and speed controls.
Read more here -
Sport Mechanics For Coaches (3rd Edition)
This book provides comprehensive guidance on biomechanics, proper technique correction, and tailored training programs, which can be applied to volleyball training.
Read more here -
Enhancing Volleyball Training: Empowering Athletes and Coaches
This article explores systems supporting volleyball training, including the use of advanced technologies like Inertial Measurement Units and machine learning.
Read more here - Top Volleyball Training Machine Manufacturer and Supplier in China

